


Your floors take a beating every single day. Foot traffic, spills, dropped tools, car tires it adds up fast. Most traditional flooring just wasn’t built for that kind of punishment. That’s why more homeowners are looking for something tougher, cleaner, and honestly, a lot better-looking.
Resin-based floors have been a staple in commercial spaces for years. Now they’re making their way into homes, garages, and everyday living spaces. And for good reason they’re durable, low maintenance, and they look great. Whether you’re renovating your kitchen or finally fixing up that garage, resin flooring is worth a serious look.
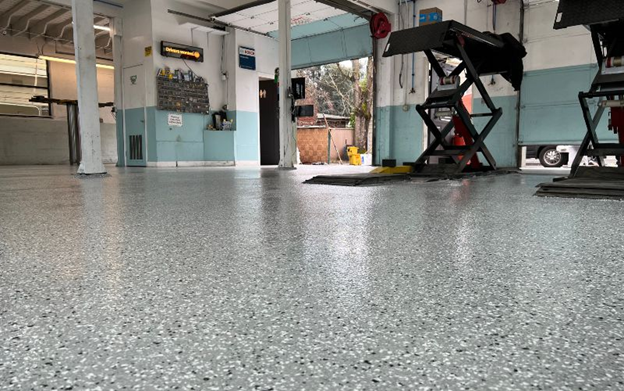
If you’ve been searching for a flooring upgrade in your garage specifically, you’ve probably come across epoxy garage flooring as one of the top options. It’s popular for a reason. Epoxy bonds directly to concrete, creates a hard shell-like surface, and holds up against oil stains, tire marks, and heavy equipment. It’s one of the most practical upgrades you can make to a garage full stop.
Homeowners in Woodland Park, NJ are especially embracing this trend. The area sees real seasons hot summers, cold winters, and everything in between. Floors need to handle temperature swings, moisture, and road salt tracked in from the driveway. Resin floors, especially epoxy, are built for exactly that kind of environment.
This guide covers everything you need to know. From the different types of resin flooring to installation tips, design options, and real cost breakdowns we’ve got you covered. Let’s get into it.
What Resin Flooring Actually Is
Resin flooring isn’t just one thing. It’s a category of flooring systems that use synthetic compounds to create a hard, seamless surface. Think of it like a coating that chemically bonds to your existing floor and transforms it into something much stronger.
The most common types you’ll encounter are:
- Epoxy — the most widely used, especially for garages and basements
- Polyurethane (PU) — more flexible, better for UV-exposed areas
- Polyaspartic — faster curing, great for quick installations
- MMA (Methyl Methacrylate) — ideal for cold environments and fast turnarounds
- Self-leveling compounds — smooth out uneven surfaces beautifully
Each type has its sweet spot. Epoxy is king for garages. Polyurethane works well in living spaces. Polyaspartic is great when you need the job done fast. Knowing which one fits your project saves you time, money, and headaches.
Why So Many Homeowners Are Making the Switch
There’s a reason resin floors keep showing up in renovation projects. They genuinely solve problems that other flooring types can’t.
They’re tough. Resin floors resist scratches, impacts, and heavy loads. Drop a wrench on an epoxy floor and it barely blinks. Try that with vinyl or tile and you’re looking at chips and cracks.
They’re easy to clean. No grout lines. No porous surfaces where bacteria and mold can hide. A quick mop and your floor looks brand new.
They look good. Modern resin flooring isn’t just utilitarian gray. You’ve got metallic finishes, color flakes, marble effects, and custom patterns. It’s genuinely beautiful when done right.
They last. A properly installed resin floor can last 20 years or more with minimal upkeep. That’s a much better investment than replacing carpet or laminate every 5–10 years.
For homeowners in Woodland Park, NJ, durability matters a lot. Garages here go from freezing in January to baking in July. Floors crack, peel, and chip under those conditions. Resin systems especially epoxy are formulated to handle thermal expansion and contraction without failing.
Breaking Down the Real Costs
Let’s talk about money, because this is where a lot of people get tripped up.
If you’ve been researching resin flooring for a while, you’ve probably searched something like garage epoxy floor cost and gotten a pretty wide range of numbers. That’s because pricing really does vary based on floor size, product quality, condition of the existing concrete, and whether you hire a pro or do it yourself.
Here’s a general breakdown to give you a realistic picture:
| Option | Estimated Cost (per sq. ft.) |
| DIY epoxy kit | $2 – $5 |
| Professional basic epoxy coating | $3 – $7 |
| Professional full flake system | $5 – $12 |
| Polyaspartic or metallic finish | $8 – $15+ |
For a standard two-car garage in Woodland Park, NJ — roughly 400–500 square feet — a professional job typically runs between $1,500 and $5,000 depending on the system you choose and the state of your concrete.
DIY kits are cheaper upfront, but they require real surface prep to work properly. Skip the prep and the coating peels within a year. That’s not a bargain — that’s a frustrating do-over.
Practical tip: Always get at least two quotes from local contractors. Ask them specifically what’s included in the prep work. If a quote doesn’t mention grinding or shot blasting the concrete, that’s a red flag.
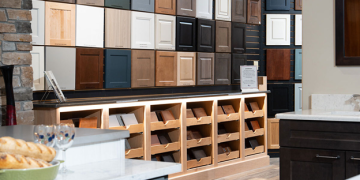
Choosing the Right System for Your Space
Not every floor needs the same solution. Here’s a quick guide to help you match the right product to the right space.
Garage floors — Epoxy is the default choice. It’s cost-effective, extremely durable, and handles everything garages throw at it. For a cleaner, longer-lasting result, consider a polyaspartic topcoat over the epoxy base.
Basement floors — Check for moisture first. High moisture levels can cause delamination. Use a vapor barrier primer and choose a moisture-tolerant epoxy system.
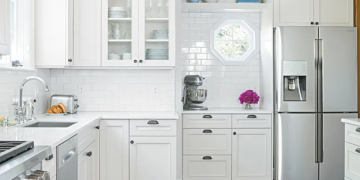
Kitchen and utility areas — Polyurethane systems work well here. They’re slightly more flexible than epoxy and handle the thermal changes from cooking environments better.
Living rooms and open spaces — Self-leveling resin floors with decorative finishes look stunning. Metallic pigments create a one-of-a-kind effect that genuinely looks like a high-end design feature.
Patios and outdoor areas — UV-stable polyurethane or polyaspartic coatings are your best bet. Standard epoxy yellows when exposed to sunlight over time.
The Installation Process (Step by Step)
Understanding how installation works helps you ask better questions and spot shortcuts. Here’s what a proper installation looks like from start to finish.
Step 1 — Surface assessment. The installer checks for cracks, moisture, and existing coatings. This step determines what prep is needed and which products will bond properly.
Step 2 — Surface preparation. This is the most critical part. The concrete is mechanically ground or shot-blasted to open the surface and create a profile for the resin to grip. Any cracks are filled and patched.
Step 3 — Primer application. A penetrating primer is rolled on to seal the concrete and improve adhesion.
Step 4 — Base coat. The main resin layer is applied. This is where color choices, flakes, or pigments are added.
Step 5 — Topcoat. A clear protective topcoat seals everything and adds gloss or matte finish, plus any anti-slip additives if needed.
Step 6 — Cure time. Depending on the system, floors may need 24–72 hours before foot traffic and up to 7 days before parking vehicles on them.
Design Options
This is where resin flooring surprises people the most. It’s not just grey and industrial.
Vinyl flake systems are one of the most popular choices for garages. Colored chips are broadcast into the wet epoxy, creating a terrazzo-like look that also hides minor imperfections. It adds texture too, which helps with slip resistance.
Metallic finishes use pigment powders mixed into the resin. The result looks like liquid metal was poured onto your floor. It’s dramatic and genuinely beautiful popular in showrooms and high-end residential garages.
Quartz systems broadcast colored quartz granules into the base coat. The result is a very durable, textured surface that’s perfect for wet areas and spaces that need extra grip.
Solid color coatings are the simplest option. A uniform color across the floor. Clean, modern, and easy to maintain. Light colors make spaces feel bigger. Dark colors hide tire marks better.
Practical tip: If you’re in Woodland Park, NJ and you want the floor to hide road salt and winter grime, a medium-toned flake system is one of the most practical choices. It looks great and camouflages the mess.
Maintenance What You Actually Need to Do
Resin floors are low maintenance, but they’re not no maintenance. Here’s the honest version.
Daily/weekly: Sweep or dust mop to remove grit. Grit acts like sandpaper underfoot and dulls the finish over time. This is the single most important maintenance habit.
Monthly: Mop with a mild, pH-neutral cleaner. Avoid harsh acids or bleach-based products — they can dull the topcoat.
Annually: Inspect for any chips, scratches, or dull spots. Small repairs are easy and cheap. Catching them early prevents them from spreading.
Every 5–10 years: A recoat of the topcoat layer can refresh the finish and extend the floor’s life significantly. Much cheaper than starting over.
What to avoid:
- Steel wool or abrasive scrubbers
- Vinegar or acidic cleaners
- Dragging heavy equipment without pads underneath
Red Flags to Watch Out For
Not all resin flooring jobs are equal. Here’s what to watch out for whether you’re buying a DIY kit or hiring a contractor.
Skipped surface prep. If the contractor isn’t grinding the concrete, the coating will peel. There’s no shortcut around this.
No moisture test. Moisture is the number one reason resin floors fail. Any reputable installer tests for it first.
Very low quotes. Resin flooring isn’t cheap to do properly. A quote that seems too low usually means corners are being cut somewhere.
No references or portfolio. Ask to see past work. A good installer has photos and happy customers they can point you to.
Generic big-box kits without primer. DIY kits are fine, but many don’t include a proper primer. Without primer, adhesion is compromised. Always buy a kit that includes a primer coat.
Considerations
This isn’t often talked about, but it matters. Resin flooring has some real sustainability advantages.
The longevity factor is huge. A floor that lasts 20+ years doesn’t end up in a landfill every decade. That’s better for the environment by default.
Low-VOC formulations are now widely available. If indoor air quality is a concern especially in living spaces look for products labeled zero-VOC or low-VOC. They’ve come a long way in recent years without sacrificing performance.
Resin can also be applied directly over existing concrete. No demolition required. No material waste. That’s a meaningful advantage over tear-out-and-replace renovation approaches.


